5.3. Rock RMS Integration
Home → ManagedMissions FAQ → Integration and Church Management Software → Rock RMS Integration
- Go to www.managedmissions.com
- Click “START NOW” in the top right corner.
- Choose “A Church or Organization Administrator” and flow the registration process.
If you already have signed up follow these steps:
- Login to your account at www.managedmissions.com
- Click on Account Admin
- Click on API --> Introduction
- Generate an API key at the bottom. If an API key already exists, continue to step 5.
- Click on Integrations
- Select Rock (MangedMissions will automatically ask you to add Rock RMS to your paid services if you haven’t already subscribed.)
- Copy the Authentication Code
- Log in to Rock RMS and Paste the Code in the Settings screen in the ManagedMissions Rock RMS Plug-in.

Screenshots for the Rock side of integration.
Here is how:
1) To install this plugin, select Admin Tools > Rock Shop from your own instance of Rock.
2) Click on “ManagedMissions” plugin.
3) Click “Install”.
4) Use your Rock RMS credentials to login and install the plug-in.
5) Copy Authentication Code (Outlined in above steps)
6) Click on gray gear on the right side of the page.
7) Paste Authentication Code in box and click Save Changes.

Additional Plug-in Settings:
There are three additional settings that can be used for the MM + Rock sync process if desired.
- Rock Fundraising Parent Group: By default, ManagedMissions will create a Fundraising Parent Group called “Managed Missions” in your Rock Fundraising Group Tree Picker where imported unmatched Mission Trips from Managed Missions will be placed. If your organization already has an existing Fundraising Group in Rock for Mission Trips, you can choose that group from the Group Picker.
- Rock Fundraising Sync Group: Choose to either have the ManagedMissions plugin search through all of your Rock Groups for matching Mission Trips (Sync All) -or- if you have a lot of groups choose one or more groups under which the ManagedMissions plugin will look for matching Mission Trips. (Choosing where the Plugin searches should always be faster.)
- Contribution Fund Location: This setting is used when importing funds (contributions) from ManagedMissions into Rock. A default Fund group “Mission Fund” is set by Rock for all imported contributions. However, if you would like to change the Fund where imported contributions from ManagedMissions are entered under, you can do so on this screen.
Once all the settings are in place, you will be able to run a “Sync All” from the ManagedMissions plug-in screen.
Once downloaded you will be able to run imports from ManagedMissions.
Trips tab - First page that opens when you log in:

The trips tab allows you to view all of the trips from ManagedMissions available for import into RockRMS.
- Clicking import on a specific trip row will import that specific trip as a new RockRMS Fundraising Group and import all of it’s associated donors, team members and contributions.
- Clicking Import All will run an import of all of the available trips.
- You can filter/search for a specific trip by typing in the search box above.
Trip Members tab Screenshot:

The Trip Member tab allows you to view all of the team members from ManagedMissions available for import into Rock RMS as People.
- Clicking import on a specific team member row will import that specific team member as a new RockRMS Person or match an existing Person in Rock RMS if they exist. It will also create the Fundraising Group for this team member’s trip, any associated import, all of the associated contributions and any donors,and team members.
- Clicking Import All will run an import of all of the available team members.
- You can filter/search for a specific team member by typing in the search box above.
Donor Tab Screenshot:
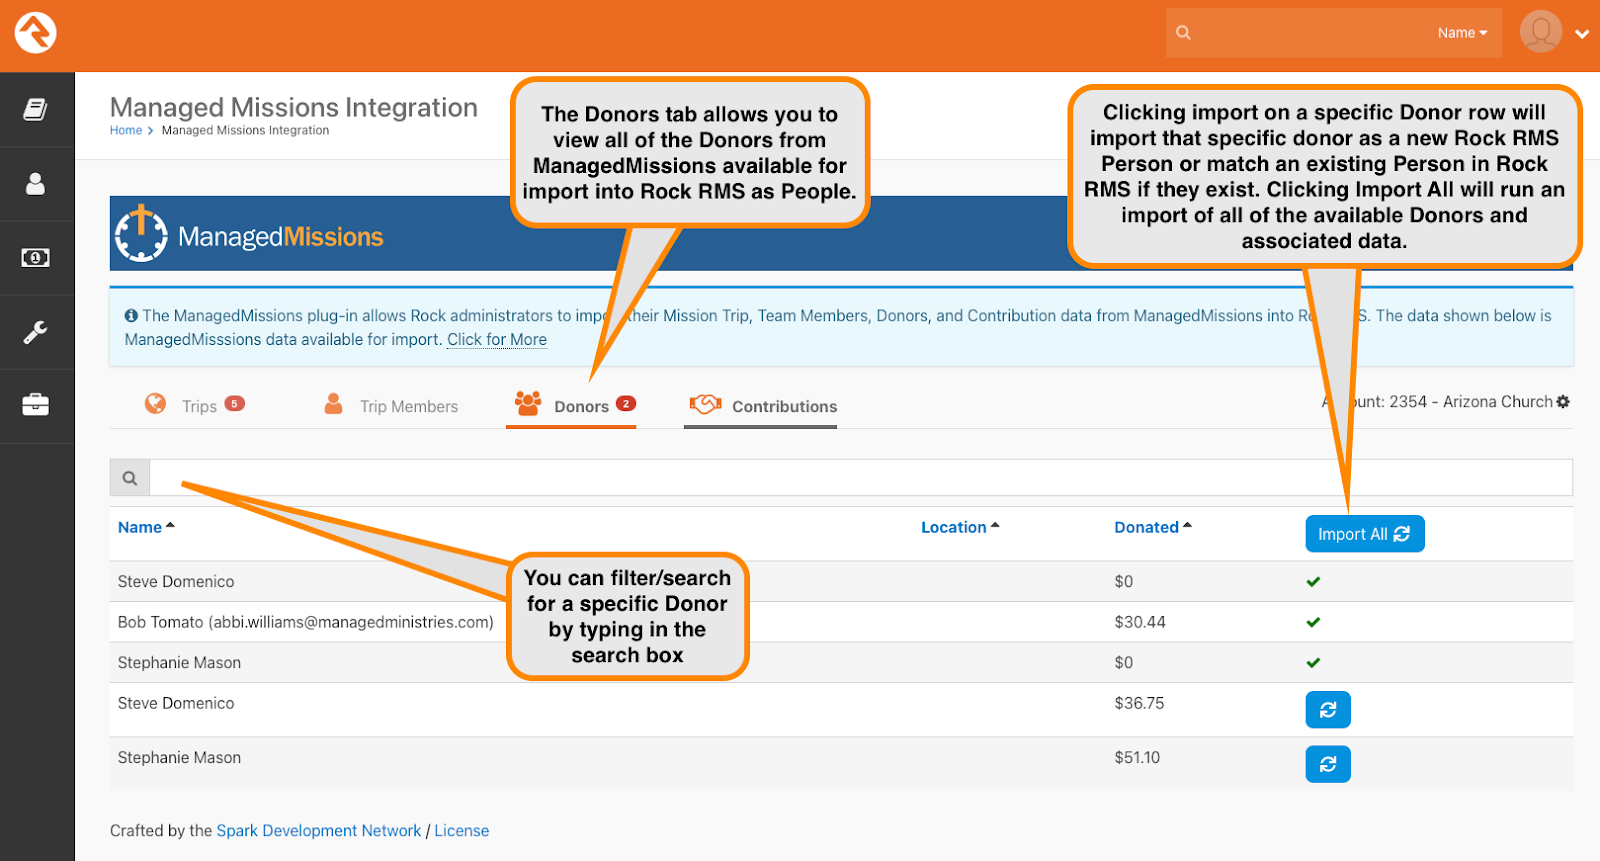
The Donors tab allows you to view all of the Donors from ManagedMissions available for import into Rock RMS as People.
- Clicking import on a specific Donor row will import that specific donor as a new Rock RMS Person or match an existing Person in Rock RMS if they exist. It will also create the Fundraising Group for this team member’s trip, any associated import, all of the associated contributions and any donors, and team members.
- Clicking Import All will run an import of all of the available Donors and associated data.
- You can filter/search for a specific Donor by typing in the search box above.
Contributions Tab Screenshot:
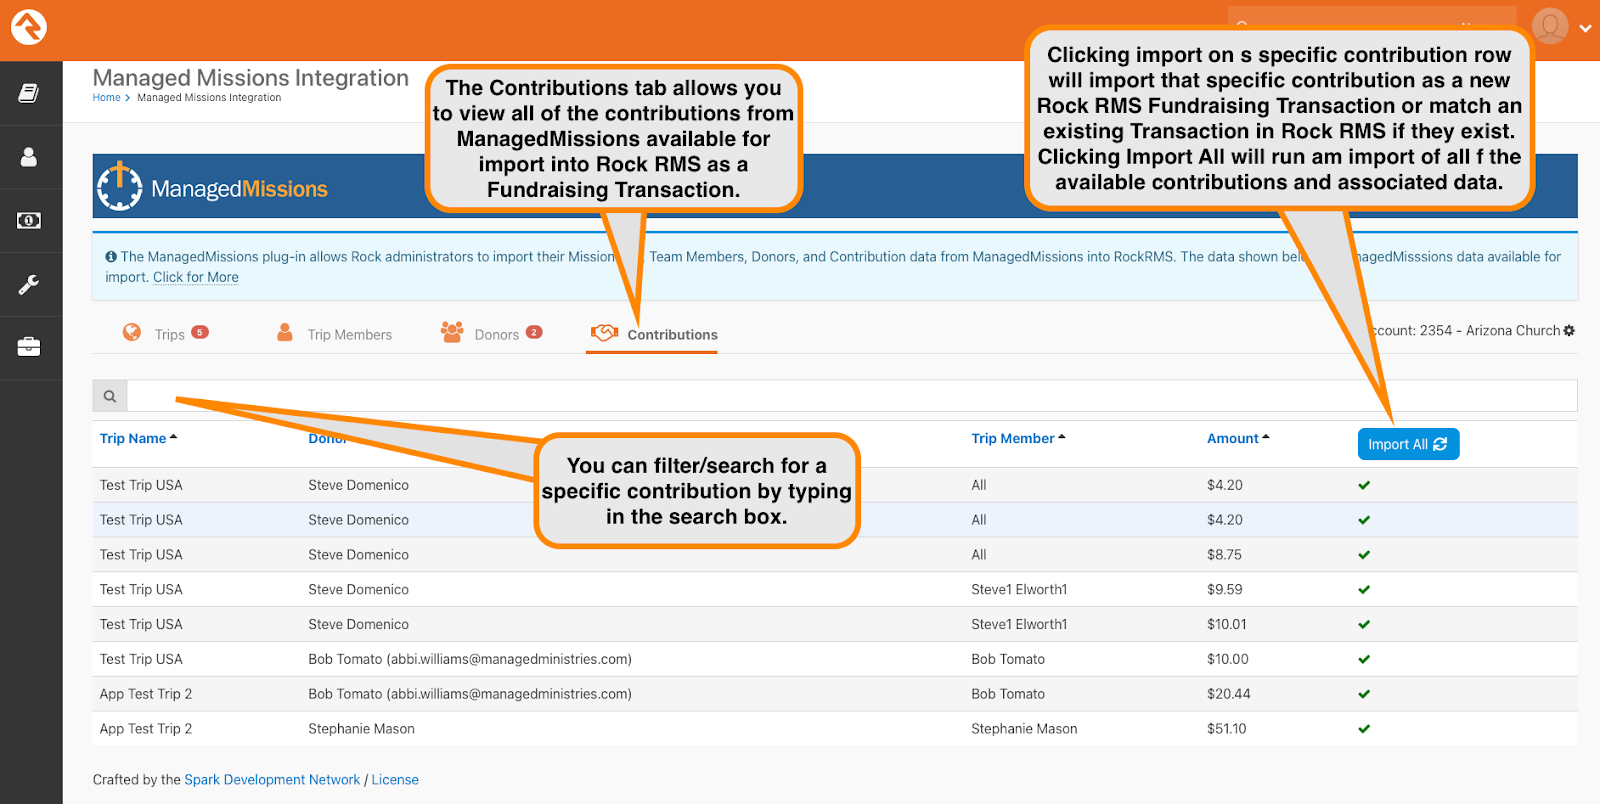
The Contributions tab allows you to view all of the contributions from ManagedMissions available for import into Rock RMS as a Fundraising Transaction.
- Clicking import on a specific contribution row will import that specific contribution as a new Rock RMS Fundraising Transaction or match an existing Transaction in Rock RMS if they exist. It will also create the Fundraising Group for this team member’s trip, any associated import, all of the associated contributions and any donors, and team members and. Clicking Import All will run an import of all of the available contributions and associated data.
- You can filter/search for a specific contribution by typing in the search box above.